VS Code in exam configuration - User guide
Step 1 - Install VS Code
Download and install Visual Studio Code from code.visualstudio.com/download.
In S[UW][12] and N(8|10|11) labs, VS Code is already installed in both Windows and Linux modes.
Step 2 - Install the Extensions related to C++ in VS Code
Open the Extensions view by clicking the Extensions icon  in the Activity Bar on the side of VS Code or by pressing
 Ctrl+Shift+X.
Make sure that the following Extensions are installed and enabled:
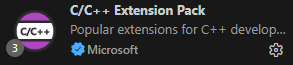
- C/C++ Extension Pack (by Microsoft)
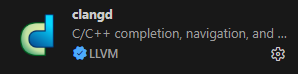
- clangd (by LLVM)
- The clangd Extension needs the
clangdexecutable. It will prompt you to install it if it's missing.
It may also installed manually, e.g. usingapt install clangdordnf install clang-tools-extraon Linux.
With these extensions, you shall be able to build and debug C/C++ programs and get some (non-AI) hints while editing.
Step 3 - Install the Continue Extension in VS Code
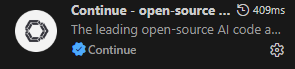
- Continue (by continue.dev)
Step 4 - Configure the Continue Extension
Open the Continue Chat by pressing the Continue icon  in the Activity Bar on the side of VS Code.
In the top right corner of the chat, press the cogwheel icon  to open the settings.
Select the Configs section  on the left.
Use another cogwheel icon to open the Local Config 
This will open the ${HOME}/.continue/config.yaml file in the editor.
Replace the content of the file with the following:
name: Local Config
version: 1.0.0
schema: v1
models:
  - name: qwen3-coder:30b
    provider: ollama
    apiBase: http://acheron.ms.mff.cuni.cz:42066/doejohn/12345678/
    model: qwen3-coder:30b
    roles:
      - chat
Replace the last two elements in the apiBase (doejohn/12345678) with your SIS Login name and Personal number (aka UKČO)
Save the file (Ctrl+S) and restart VS Code to apply the changes.
Step 5 - Using the Continue Extension
Open a C/C++ source file in VS Code.
Open the Continue Chat by pressing the Continue icon in the Activity Bar on the side of VS Code.
You can now interact with the AI assistant by typing your questions or requests in the chat input box and pressing Enter.
The AI assistant will respond based on the context of your code and provide suggestions, explanations, or code snippets as needed.
Current status of the AI support
- Beware, all communication with the AI is logged and available to the teachers.
- The system is still under development, the functionality may change and may be temporarily unavailable.
- Currently, the AI is accessible for all students of NPRG041. The computing capacity is, however, limited and the response may be slow.
- On the days of exam terms, the general accessibility will be switched off. Exam participants will receive 6-digit access tokens (instead of the SIS login/number pair) that will work only for the duration of the exam.